


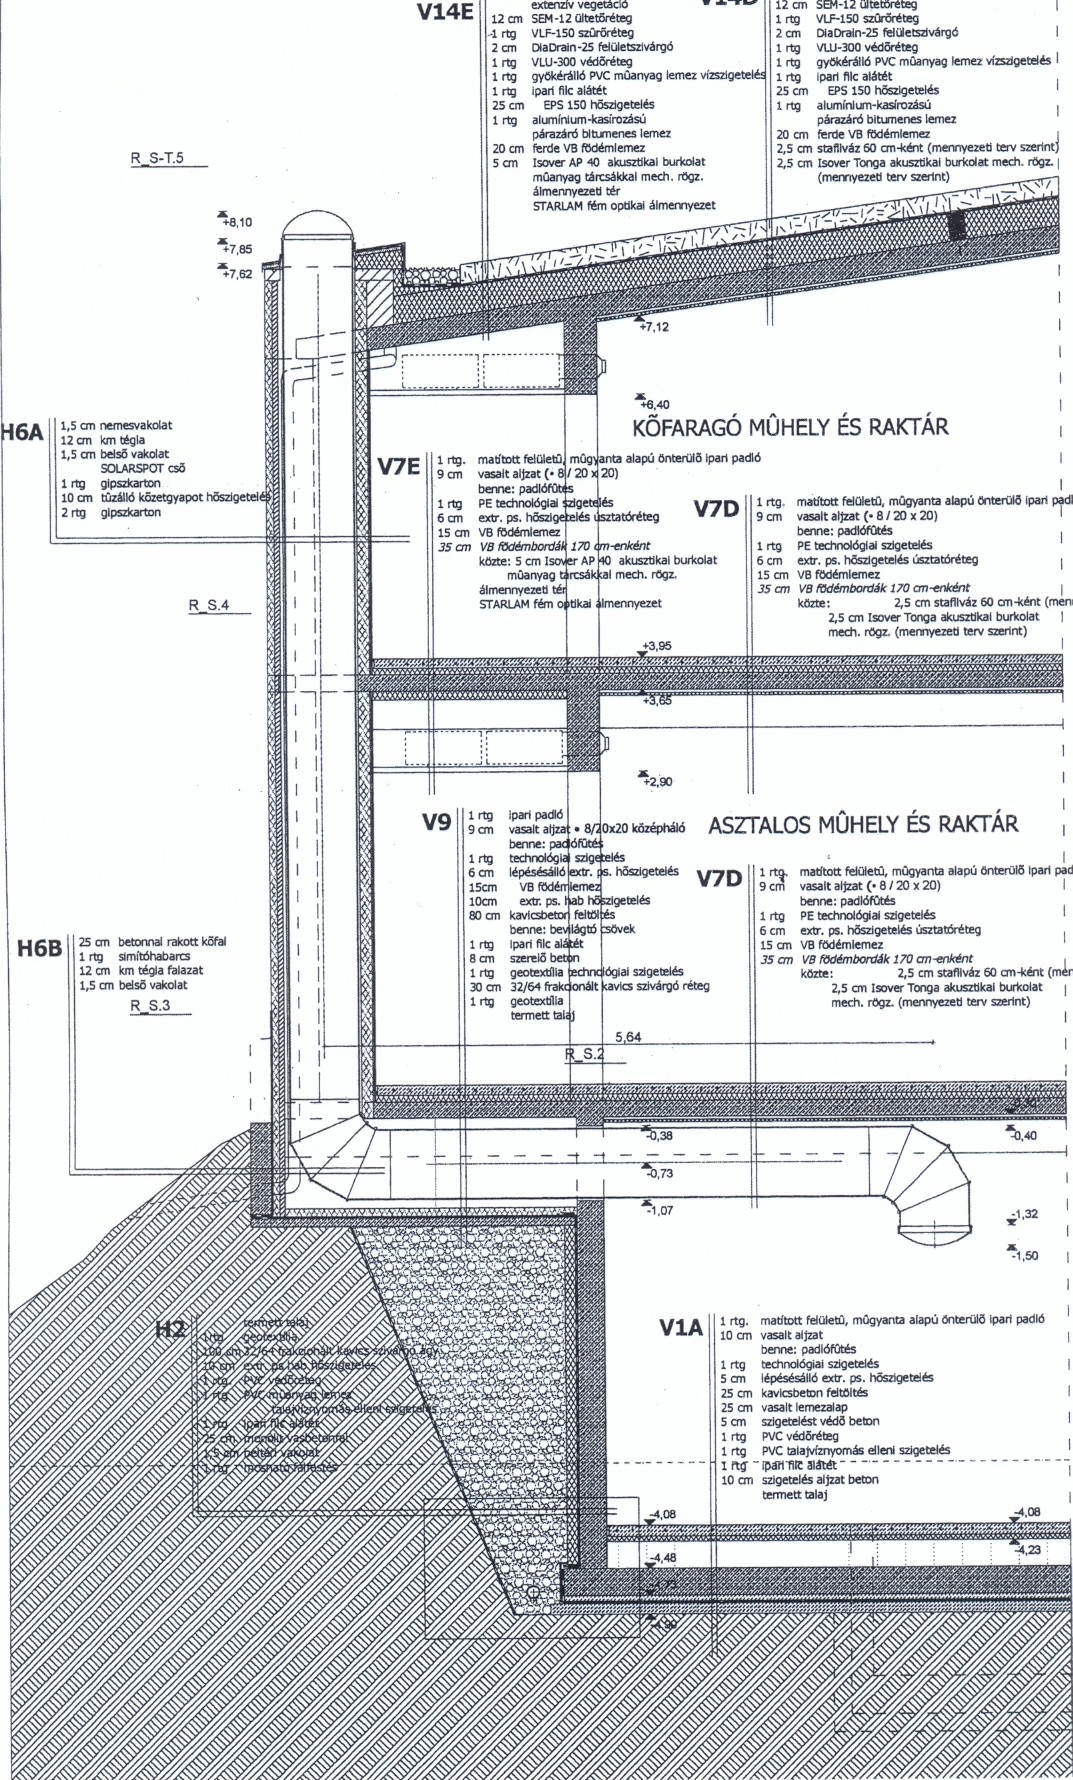
Can I install a Solarspot® myself?
 The first thing to consider when contemplating a DIY installation is can you – and probably more importantly, are you prepared to – climb onto your roof? If the answer is ‘no’, don’t worry, we can arrange for a registered installer to do the work for you.
If accessing the roof is not a problem for you, and you are a competent DIYer, then installing a Solarspot® Tubular Daylighting System (TDS) should not present you with too many problems.
Remember, working at height can be dangerous and should only be done by competent individuals adhering to strict safety codes and conduct.
Both the Solarspot® D-25 and D-38 systems, 250mm and 375mm diameter respectively, should fit easily between standard roof rafters with no structural changes (always check measurements carefully before ordering), and no need to build a skylight shaft..
Full installation in structions you can view on the installation guide menu item or you can download the video on the downloads menu item.
What are the options for installation?
If the DIY option is not for you, we can arrange for an experienced, independent installer to fit your Solarspot® TDS for you, quickly and efficiently with the minimum of disruption, in all areas of Hungary. If you would like more information or an idea of cost for installation of one or more systems into your home, call us on 0620/99-99-004 or contact us by email.
Alternatively, any competent builder, roofer or home maintenance professional should be able to install your Solarspot® TDS for you.
How long does it take to install?
A Solarspot® TDS flat roof unit could be installed in less than one hour by an experienced installer. A pitched roof system with slates or tiles could be done in as little as three hours. For the first-time installer, more time should be allowed. If installing yourself, pick a nice (rain free) day and start early just in case you have an issue that takes a little time to resolve. Also, always start on the roof so that you can have this part finished should the weather take an unexpected turn.
Should I install the Solarspot® when installing a new roof or wait until the roof is finished?
A new roof is the perfect time to install a Solarspot® TDS, your roofer should be able to install it at the same time as doing the other work with the minimum of extra effort. Alternatively, a Solarspot® TDS can be installed into a recently completed or established roof just as successfully.
If you have an old roof that you believe may be in need of attention you should have it checked by a roofing professional before having a Solarspot® TDS, or anything else, installed.
What if I have no attic space?
No problem, Solarspot® TDSs are designed for installation even where there is no access to the attic or no attic at all – eg. flat roofs.
Can I install a Solarspot® TDS through a wall?
When an area or roof can only be accessed from the ground or through a wall, a Solarspot® TDS can deliver light horizontally, as well as upwards, into the heart of a building. For thru-wall or underground installation, contact us today about this.
Can I install a Solarspot® TDS in a caravan, house boat or mobile home?
Yes, and probably without any structural modifications. A Solarspot® TDS is a great solution for the dark interiors that can result from windows shaded by awnings and patio covers as it will deliver an abundance of light without generating any heat build-up.
Can I light the ground floor rooms of a two-story house?
The Solarspot® D-25 is the undisputed world champion when it comes to meeting this challenge. No other system can deliver as much light through such a narrow tube. Despite being only 250 mm in diameter it can deliver light efficiently to distances of more than 7 m.
Can I locate the dome on a north-facing roof?
Yes, but it may affect the overall performance. If the roof is very steep and shady you will see a difference during winter months.
On overcast days, the light level is even across the whole roof so a north facing aspect will have little baring on the overall performance.
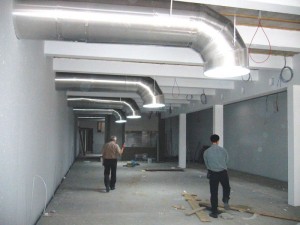
How to install a Solarspot tubular daylight system
 Before starting any installation work ensure that your workarea is clear of obstructions and you have taken all necessary safety precautions. Ensure that you have checked the distance between joist and rafters to determine that the system you have purchased will fit through the space savailable.
Solarspot D-25 requires a joist gap of 250mm and the D-38 requires 375mm.
Below is a guide showing you the suggested sequence of events and the best method of installing a Solarspot daylight system. It is meant as a guide only as individual installations may vary due to roof type and roof construction. If you are in any doubt, please contact us directly on 01908 299117 for more information.
Suggested order of installation
 Locate the position and install the ceiling tube.
- Determine the best route through the loft and fit the flashing.
- Install the tube extensions and adjustable angles.
- Finally, fit the diffuser.
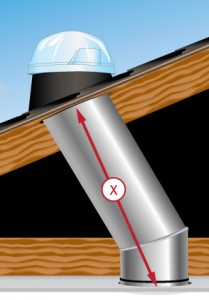
The ideal situation is to have the shortest tube possible. This is normally achieved by taking the tube as close to 90° from the underside of the roof, not 90° from the ceiling. The exception to this would be if the ‘shortest’ point on the roof was in shade and a brighter location existed that could be easily reached by installing a longer tube extension.
If, having read the installation guide, you’d feel happier getting the system fitted by a professional installer, our installer colleague is on hand to do the job for you.
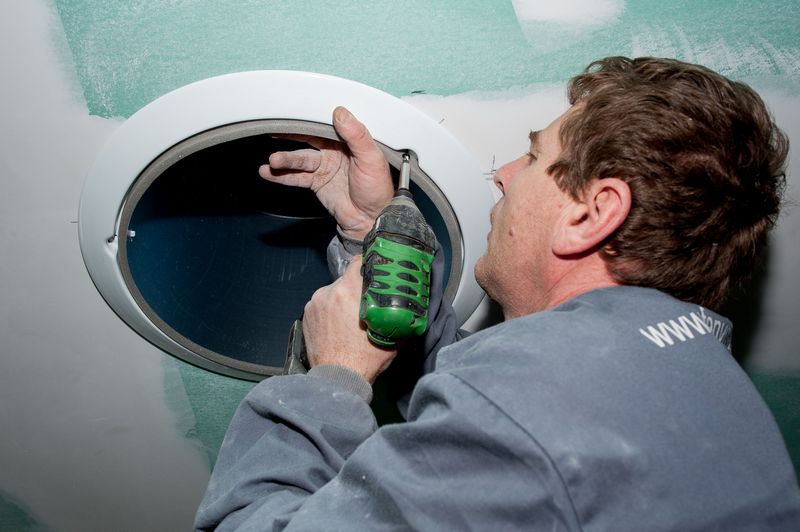
Installing the diffuser – plaster board ceilings
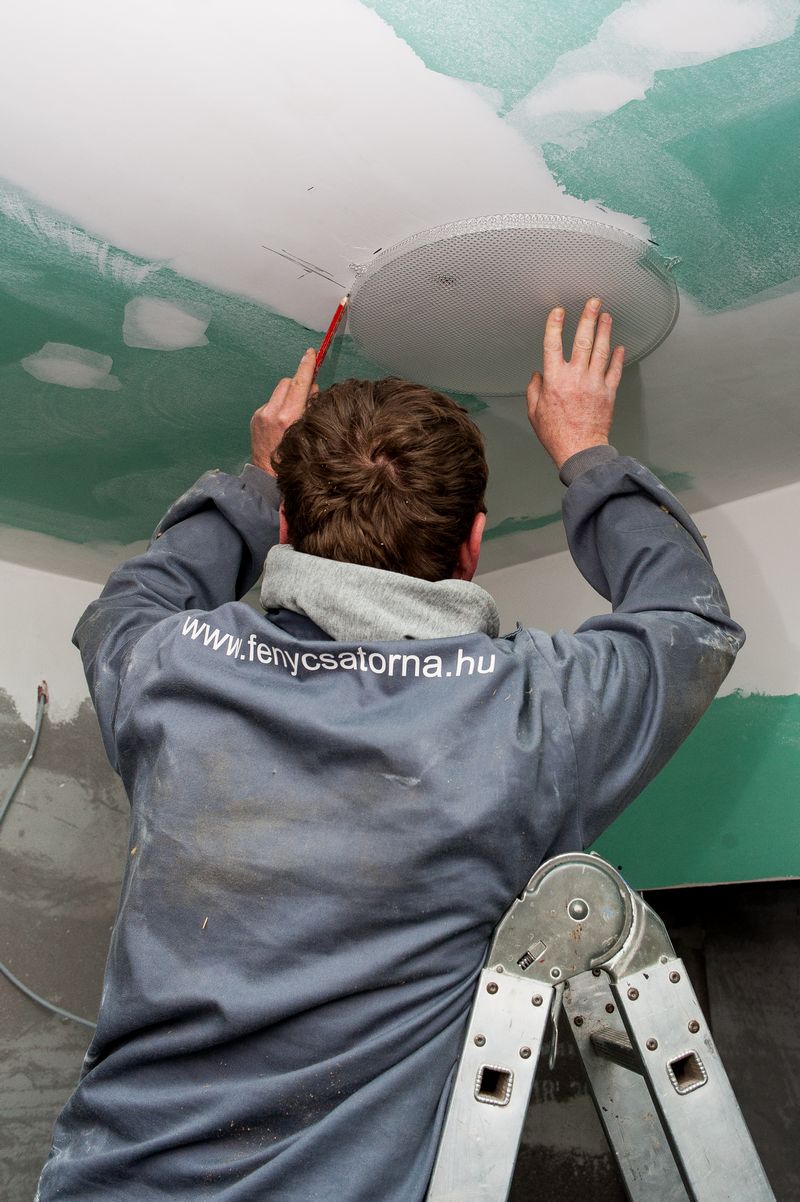 First decide the position of the diffuser in the ceiling. Where possible, always try and locate the diffuser in the centre of the room. Before making any cuts into the ceiling, check that there are no cables, pipes, joists or other obstructions in the way. Check from inside the roof void or loft that there is sufficient space for your Solarspot system to fit where you want it.
If the space is tight, drill a small locating hole from inside the loft at the centre point of the joists to ensure that you have enough space to fit the system through.
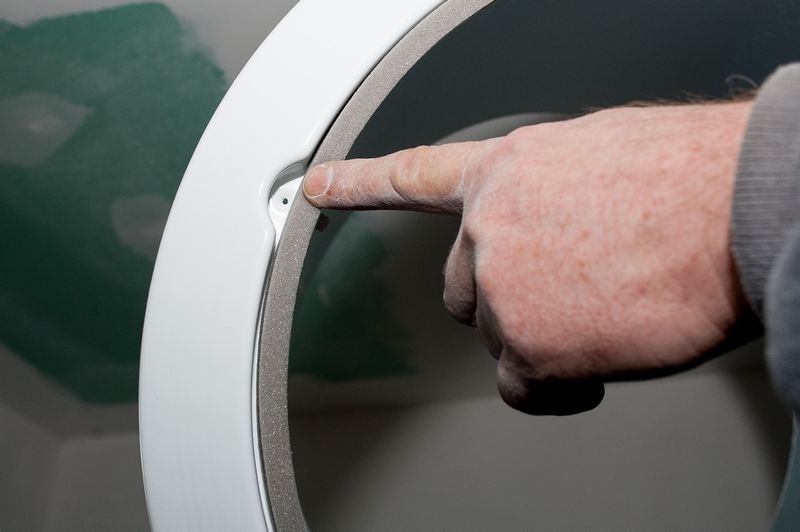
Now remove the diffusing lens from the white ceiling ring on the bottom of the Solarspot – the lens will ease out with just finger pressure.
Use the diffuser as a template to draw around – draw around the tabs as well.
Safety warning: Protect your eyes from plaster dust when cutting the ceiling aperture!
Installer tip – Alternatively, drill a hole in the ceiling so that you can locate the position in the loft. You can then draw around the diffuser from inside the loft space and cut from above to avoid falling plaster dust.
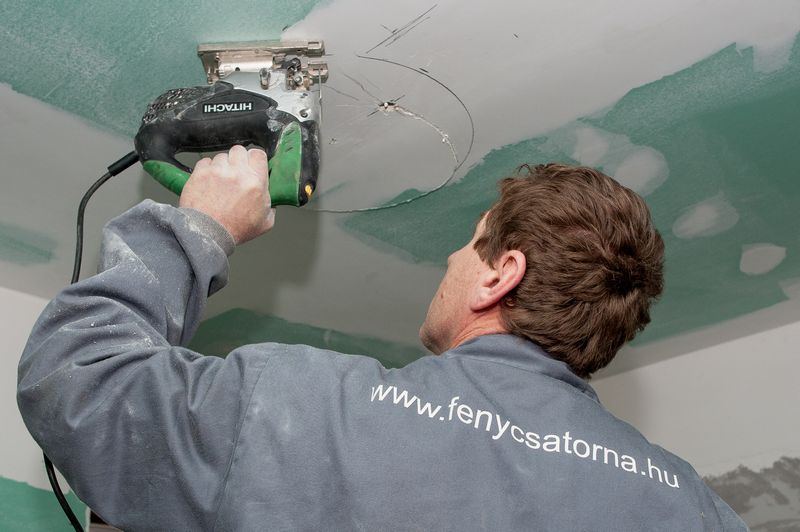 Use a drill to make a hole in the ceiling then use a plaster board or pad saw to cut around the line.
Alternatively you can use some short timber sections located in the loft space or screw directly into the ceiling (wooden ceilings only) or fix with plasterboard plugs (not supplied).
You are now ready to check the position of the tubes through the roof void and select the best location for the roof flashing.
When the tube is fully installed, and the bottom tube is pulled up tightly into position you can tighten the three diffuser screws – do not over tighten – do not refit the diffuser until you have fully completed the installation.
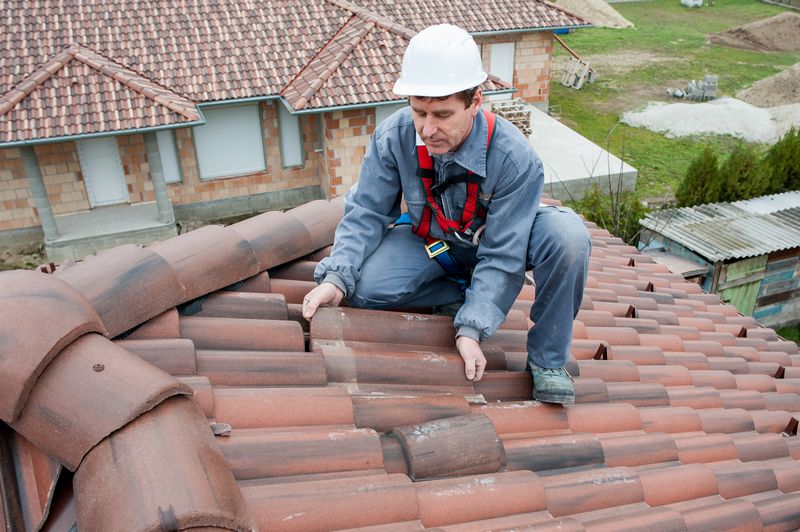
On the roof
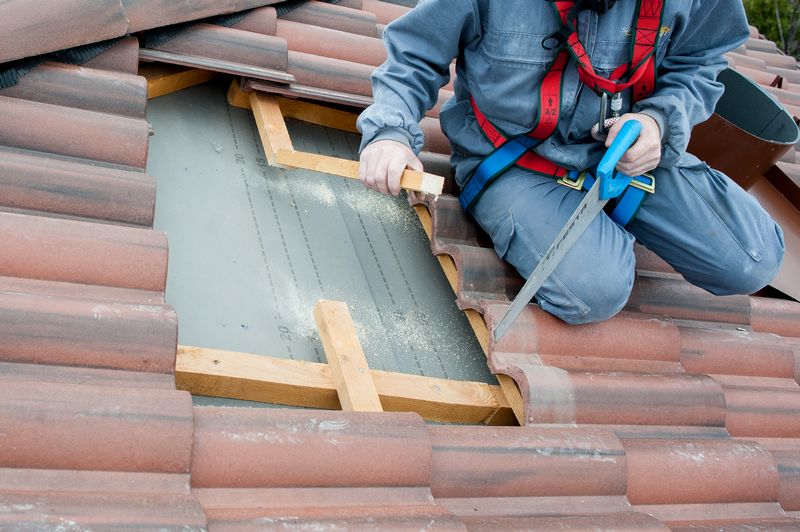
 Having decided on the position of the flashing, push a wire through the felt from inside of the loft under the tile so that you can identify the point on the roof from outside. Now remove a few tiles so that you have identified the roof entry point. Now offer the flashing into place so that you can mark the position of any tile battens that need to be cut away.
Now cut away any battens that are in the way and carefully mark and then cut a neat circle in the roofing felt for the top tube to fit through.
 Once this has been done you can temporarily fit the flashing into place with a couple of screws and test the position prior to final fixing. Offer the top into place and then go back into the loft space to check that you have the flashing in its final position. Do this by offering the internal sections up into place and checking that the angles and extensions will fit this position. If necessary, move the flashing up or down the roof so that the finished system can be successfully installed.
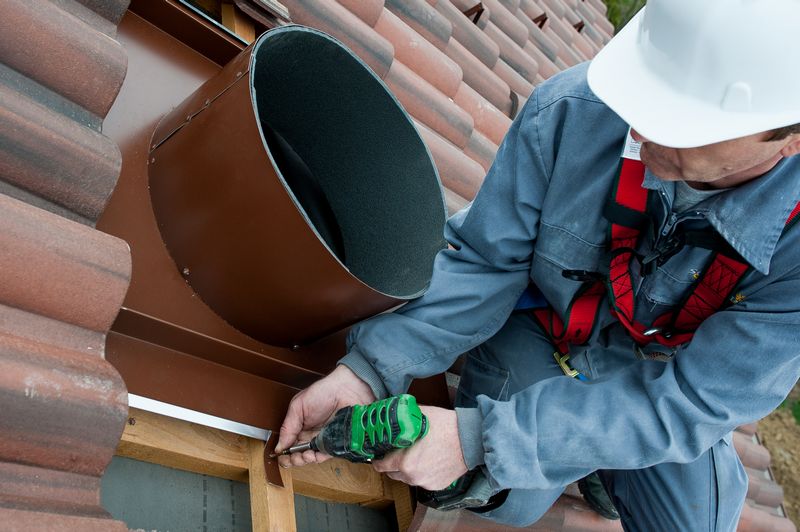
Now that you are happy with the final position of the flashing it can be fixed in place. Do this by using appropriate fixing (screws) inserted at the top corners (or as close as lines up with a roof batten) and use a second pair of fixings as close to the halfway point of the flashing.
 On certain roof tile types it may be necessary to screw the bottom corners down. This will be because the profile of the tile is causing the flashing corners to rise up and the flashing will then stop the tiles from sitting neatly on the roof.
This can be done in two ways. The first is to drill a pilot hole through the tiles beneath the flashing an drill into the supporting batten. Alternatively you can secure an additional piece of batten in place and screw straight into that.
Once this has been done you can reinstate the tiles around the flashing to provide a neat and water-tight fit. Please note that it may be necessary to cut some tiles so that the weathering of the flashing is neat and secure.
NOTE: if the foam strip on the flashing is causing the tiles to ‘kick-up’, it may be necessary to reduce the height of the foam. This can be done with a sharp pair of scissors. If you do cut the foam, try and follow the line of the tiles to create a weather-tight seal for the tiles to rest on.
With the flashing secured in position you can now fit the self-adhesive weathering strip at the bottom edge of the flashing to the roof. Firstly, carefully fold the flexible strip up and remove any lose dirt or grit from the tiles.
Fixing the dome and top tube
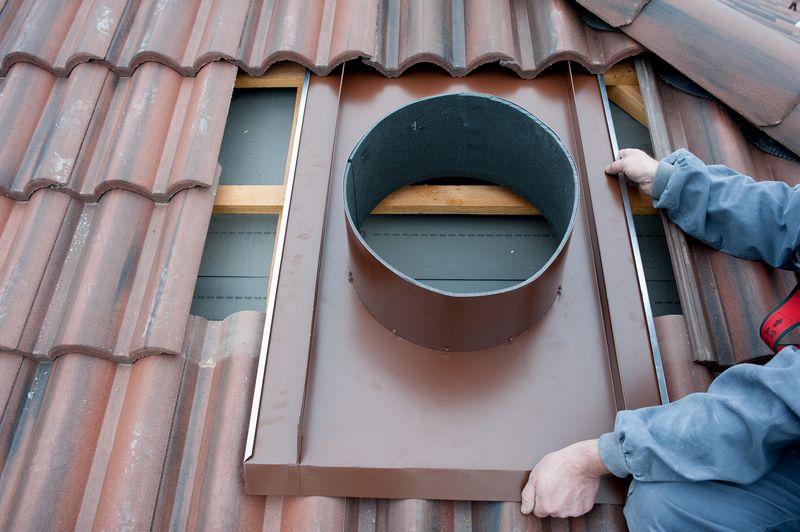 With the flashing now fixed in position it is time to fit the dome and top tube into position. First remove the protective file from the inside of the tube to reveal the reflective surface.
IMPORTANT NOTE: Always remove the protective film, even if you are not planning to install the lower tube extensions until a later date. If left in-place, the sun will bake the the protective film onto the inside of the tube lining and it will be virtually impossible to remove – permanently damaging the performance of the system.
With the film removed, place the top of the system into the up-stand of the flashing and twist the dome so that the semi-circular RIR reflector is facing to the south. Check the orientation by using a traditional compass or mobile phone app – available free on most newer smart phones.
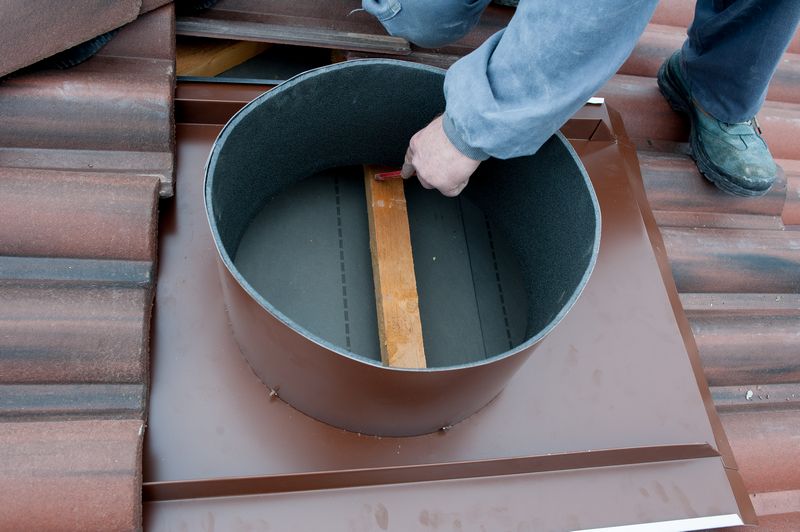 When you are happy with the orientation of the dome, drill three 2mm pilot holes in the aluminium assembly ring – use the three screws in the dome as a guide and drill below these to ensure that you have the holes evenly spaced. Use the supplied grey ‘flat-head’ screws to secure the dome to the flashing. A hand-held screw driver is recommended to avoid over-tightening and damage to the top tube.
When fully installed, the flashing and dome should resemble the photo shown on the right. Installations will vary according to roof type but the principle is the same regardless of tile type. Full colour instructions are supplied with every system.
Installing the extension tubes
 With the ceiling diffuser and top tube installed in the roof flashing, you can now plan the best configuration for the extension tubes. Using the angle adaptors and straight extensions, roughly determine the position for the tube through your loft space.
Adjustable angles
Before using the Solarspot adjustable angles, first remove the internal protective film and peel away some of the grey tape holding the sections together. To create the desired angle, gently twist one section against the other until the correct angle is achieved. Now hold the sections together by temporarily re-applying the grey tape – it may need minor adjustment when connecting with the extension tubes.
Extension tubes
 In the loft, insert the lower angled section into the ceiling tube and ‘aim’ it at the top tube. Now do the same at the top and ‘aim the other angle at the lower tube – use some small pieces of tape to hold the angles in place.
Now measure the gap between the two angles so that you can determine the distance of straight extensions required and offer the tube sections and angles into place – it will probably take several attempts to get the configuration exactly as you want it.
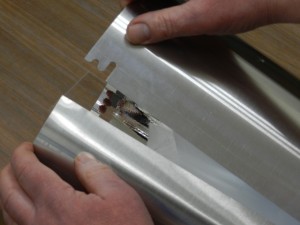
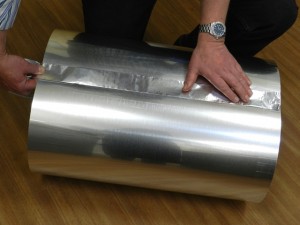
To form the straight extension tubes first remove the internal protective film. Now weave the top of the tube in the shallow notch and the bottom of the tube in the deep notch (depending on configuration) – ensuring that the middle notch is also connected. Use a length of tape to seal the seam of the tube. The extensions should ‘telescope’ together to the required length.
 With the straight section loosely assembled using small sections of tape to hold the extensions together, offer it up into place to join the top and bottom of the system. Hold this in place with more small tape pieces.
Now review the complete system to ensure that the tube has a ‘smooth run’ from top to bottom. When you are completely happy with the system, the tubes sections and angle joints can be fully sealed using the silver tape provided.
On the seams of the straight extensions you can measure and cut a length of tape and run it down the full length of the tube. Reveal a small amount of the self-adhesive and fix it at one end. Then gradually peal away the protective waxy paper and run your hand along the seam to create a seal that bonds the sections together.
 When sealing around the joints and angled sections, it it recommended to cut the tape into lengths of around 150-200mm (6-8inches) and apply these small sections one at a time rather than trying to do it in longer lengths.
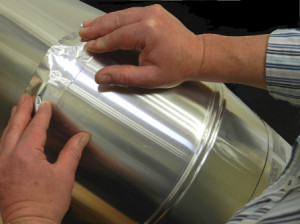
Please be aware that the tape is extremely sticky, and once in contact with the side of the aluminium tubing is very difficult to remove.
INSTALLER TIP: Wrap a length of the waxy release paper around your hand and use it to burnish down the aluminium tape to create a good seal and neat finish.
Tips on joining the tubes
 Each joint in a Solarspot system is created using the shallow or deep notch at either end of the extension tube, dome tube, angled tube etc., and this will determine how the system fits together.
For example, the opening of the dome tube (the tube that is fitted into the flashing), is always created by using the shallow notch which means that it has a ‘wide’ opening. Therefore, the extension tube that fits into this will need to be made up using a deep notch to create a ‘narrow’ opening.
 Likewise, if you are connecting and angle tube to the ‘wide’ opening on the dome tube, examine each end of the angle section to determine which end of the extension has the ‘narrow’ opening that will allow the two to sleeve into each other.
 With all of the joints sealed and tested (ask someone to turn the lights of in the loft so that you can see any cracks of light showing through and make sure that every joint is thoroughly sealed) you can fully tighten the screws holding the ceiling ring in place and put the diffuser back into the ceiling ring.
All you have to do now is stand back and enjoy all of the beautiful daylight flooding into your home.
UNDERGROUND BUILDINGS AND HOMES
 Building underground homes or extensions has never been more popular. Modern damp-proof membranes and insulators have eradicated the problems of cold, damp buildings but the issue of natural light can still be the deciding factor in the success or otherwise of a project. In order for an underground house to feel enough of a home rather than a bunker, the levels of natural light need to match, or even exceed those expected in a ‘traditional’ house.
There is absolutely no reason why an underground house shouldn’t be as bright, or even brighter, than a conventional surface built house. The inclusion of sufficient Solarspot® Tubular Daylight Systems (TDS) can more than compensate for the lack of conventional windows. In fact, it’s possible to create rooms that exceed the brightness levels enjoyed by window-lit houses.
More light than a window
 Firstly, when using a series of TDSs to light a space, you can be sure that all of the light collectors are facing the source of our light, the sun and sky. Unlike conventional windows that face out level with the ground, a Solarspot dome can be relied upon to delver the maximum amount of available light without concern of limitation like aspect (being north-facing) or shading from other buildings.
In addition, due to its light-catching technology, a massive amount of light can be gathered through a comparatively small aperture. This means that an average room could be well-lit with just two D-38 (375mm diameter) Solarspot systems – delivering much, much more light than could be achieved with a window of the same area. A bathroom or en suite would only require a D-25 (250mm) TDS.
Thermally efficient
Because of its triple-glazed design, a Solarspot TDS is also incredibly thermal efficient, guaranteeing maximum light with minimum heat loss – or heat-gain during the summer. They should also be completely maintenance free.
Drawbacks
Correct installation is vital, particularly if a green or living roof is to be used. It is not sufficient to install a flashing to the house roof-raft and then to bury the pipe in the soil and not expect future problems. A certain underground house in Cumbria featured on Grand Designs is a classic example – fails in two very important areas.
Firstly, light tubes are designed to fit through roof voids, not soil. The addition of a simple, insulated up-stand, sealed to the roof-raft and topped with a suitable flashing will guarantee a maintenance and condensation free system that should continue to deliver an abundance of light for years to come.
 The second issue is specifying the correct number of units. The simple rule is that you can’t make the house too bright. To install one 300mm light pipe into an average kitchen and expect it to do the job of a large window is naïve to say the least. If anything, over-lighting the space will compensate for any psychological effects or expectations of being underground. The worst possible effect of over-lighting will be to create a well lit space to rival that of a conservatory or garden room – without the heat or glare.
If you’re planning an underground house and need some advice or more information, contact us today on 06 20 / 99-99-004 or email to: info@fenycsatorna.hu.
FINDING AN INSTALLER
 If you’re thinking of getting a Solarspot system fitted in your home but don’t fancy doing the work yourself, we have an installer colleague who will be delighted to do the work for you.
When your Solarspot is fitted by an installer you’re assured of the best possible installation by someone familiar with the system and all of their work is guaranteed.
For installation prices, technical information or just to find out a little bit more about Solarspot just call 06 20 / 99-99-004. Lines are openfrom Monday to Friday and we’ll be happy to assist you.
Prefer to email?
If you’ve not got time to call, or need to contact us after hours, you can drop us an email and we’ll get straight back to you. Please give us as much information as you can, including your postcode, and we should be able to get back to you with a recommendation and prices.
If you would like to install your home with Solarspot tubular daylight system, contact our technical team on 06 20 / 99-99-004 or email us today.